Now that my tomato plant is withering and very near its end, the time seems ripe for a post on tomatoes. I started growing tomatoes with the hope of picking a couple of fresh tomatoes and at the very most, a dozen. But after my potted plant yielded nearly 50 tomatoes, I think I may have some valuable tips to share.
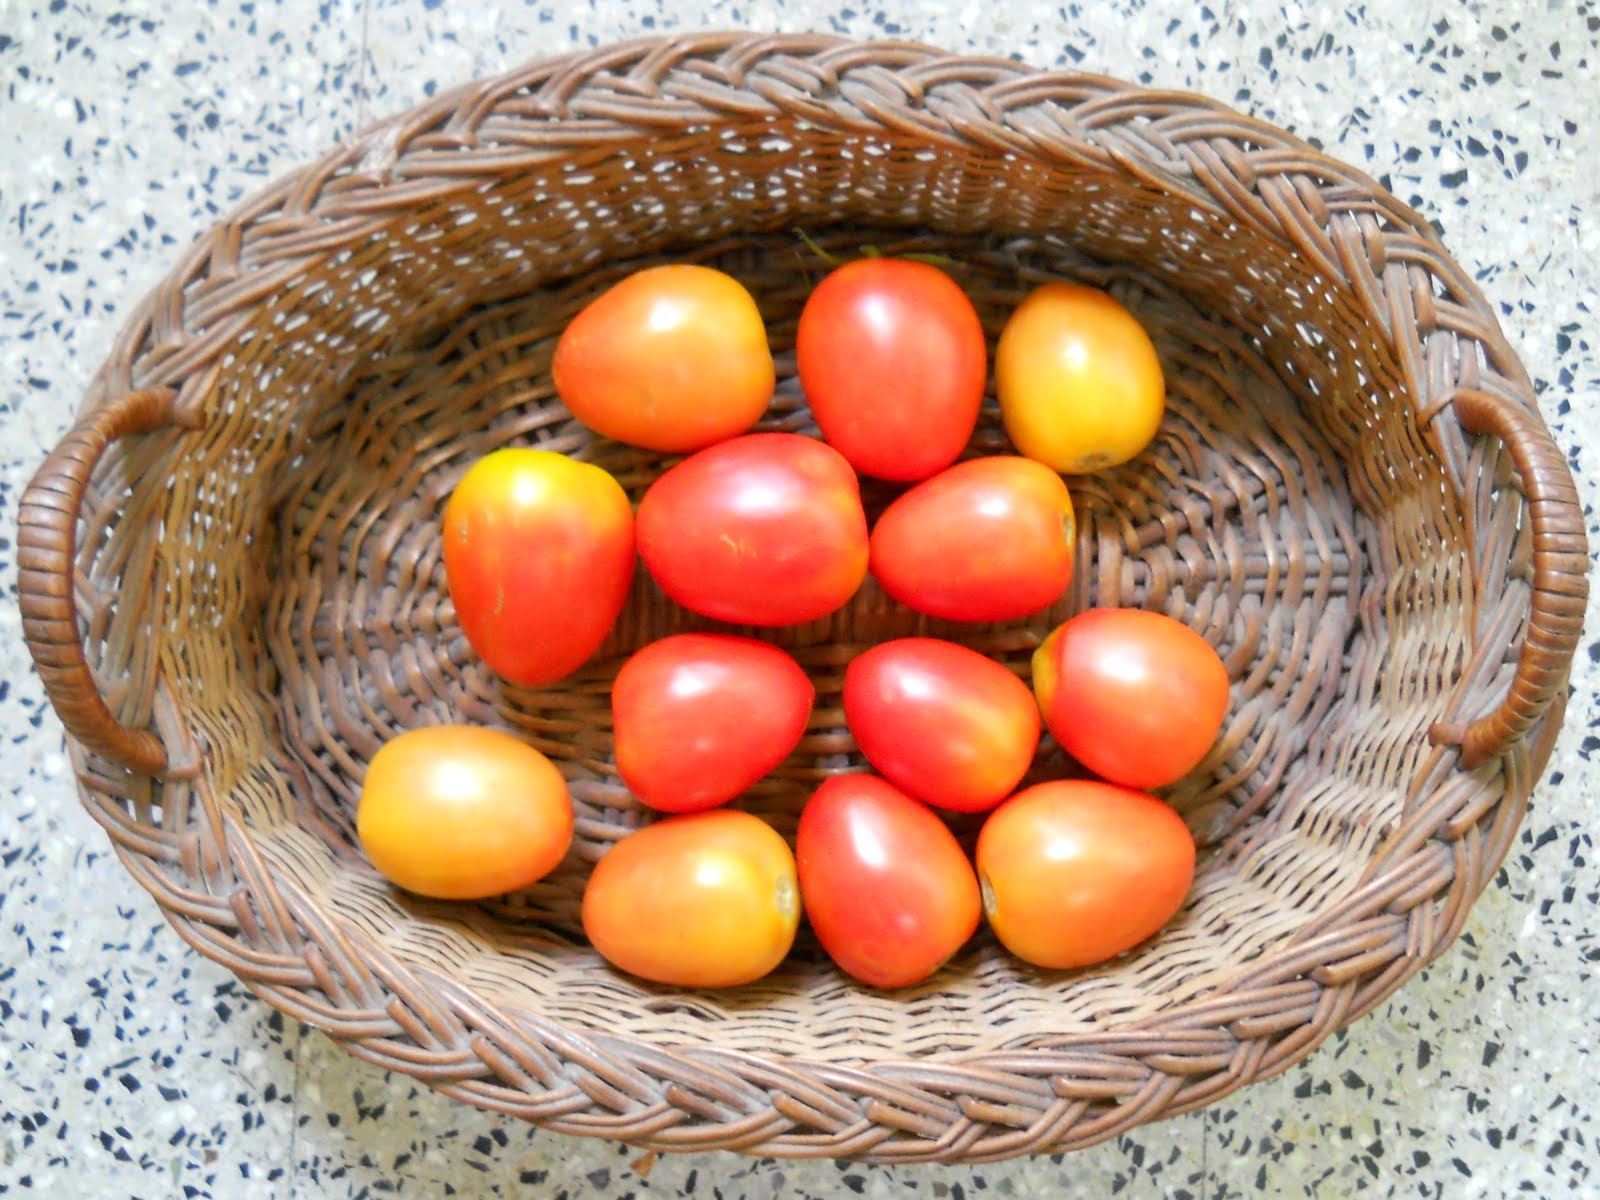 |
| Freshly Harvested Tomatoes |
So here’s a little "Guide for the First-time Tomato Grower", who doesn’t have the luxury of a patch of land.
Tomatoes are fairly easy to grow but they need plenty of sunshine, water, nutrients and TLC. You need to keep a hawk eye for pests and diseases too. If you’re more of a weekend gardener, not diligent about watering your plants, then growing tomatoes in containers may not quite work out for you. For the Rooftop Tomatoes project, you have to jump into it with both feet.
Soil Preparation: Tomatoes need plenty of nutrition from the soil. I can’t emphasize enough, how important this is. Providing rich fertile soil should be top priority. I was lucky to get rich garden soil from a nursery; the soil was loaded with earthworms and goat manure. On top of that, I used plenty of homemade compost every time I wanted to boost the soil’s fertility. Make sure you plant is in as large a pot as you can acquire. Remember, more soil means more nutrition. I used a 16 inch cement pot but I know a larger one would have worked better.
When to Sow: I am no expert on this, but here are some commonsense suggestions. Since tomatoes need abundant sunshine and water, avoid not only the winter and the rains, but also the peak of harsh summer during its life cycle, which is about 4 months. For more authoritative information on when and how to grow tomatoes visit the Tamil Nadu Agricultural University website. I planted my seeds in January and couldn’t have asked for a better harvest.
What to Sow: If like me, you live in Chennai or a city like it, you have little choice. You can only choose from the hybrid, the local naati or the cherry tomato varieties. Just dip into your grocery bag and get your seeds from a ripe tomato. I chose the hybrid one as it is the most versatile, but if you can pick up cherry tomatoes, do try them. They’re the best bet for a pot with limited resources. With a smaller fruit to make, it’s easier on the plant.
How to Sow: Start your seeds indoors. Scoop out a little tomato pulp with seeds. Soak the seeds in some water for a couple of hours. In the meanwhile, fill up 4 - 6 paper cups with good garden soil. Poke two holes in each cup and place a seed in each of the holes, lightly covering them with soil. Water them every day. Within a week, you will find tomato seedlings sprouting in all the cups. When your seedlings are about 4 inches tall, pick the healthiest one and transplant it carefully into a well prepared pot with good drainage. An easy way to transplant the seedling without disturbing its roots, is to tear out the paper cup as you plant the seeding along with the soil into a little depression in the pot. Please plant one plant per pot. (That’s a clever tongue twister I just made up!) Don’t ever be tempted to grow more than one tomato plant in a single pot. If you do, you’ll have lots of green foliage but no red tomatoes. Steel yourself and leave the remaining seedlings to die, if you can’t find them pots. Once transplanted, move your plant outdoors into a sunny spot where it can receive at least 7-8 hours of direct sunshine.
 |
| Tomato Seeds Soaking in Water |
Staking: Once planted, stake the plant straight away. Without a stake, a tomato plant will bend over once it begins fruiting. The reason, why I recommend that you stake it right away is that very soon the roots will branch out all through the pot and you will be sure to damage them when you stake the plant later. I used a thick, foot long cane stick that was lying around. A stake can be metal, wooden, or even PVC. To stake, push in your stake 1-2 inches away from the main stem. Once the plant needs support, loosely tie the main stem to the stake with a shoelace or a soft thick cord that will not cut into the stem over time.
 |
| Tomato Stake (Click to Enlarge) |
Watering: If you can’t water every day, your plant will probably fail. You have to religiously water every single day and on hot days, twice a day. If you’ve missed watering and your plant has suffered, you really can’t compensate by watering it later. And just as you shouldn’t underwater, don’t overwater. Excess water may drain out, but along with it, precious nutrients will be lost. Your tomatoes may also turn out to be more watery. Judge how damp your soil is by poking and feeling it before you water your plant.
Pruning: Again, don’t let your heart rule your head. Prevent your plant from spreading out by nipping the suckers. Suckers are shoots that rise between two preexisting main stems (leaders). If your plant is allowed to branch out extensively, it will be frittering away its energy in producing more foliage and less fruit. The plant’s energy must be conserved for producing maximum fruit. In fact after 2-3 months of rapid growth, when I noticed my plant was shooting up, I nipped off the main stem at its tip, as I knew the pot just couldn’t provide for a larger plant.
 |
| Pruning the Suckers (Click to Enlarge) |
Mulching: A layer of mulch on your soil is highly recommended. With mulch, not only will the soil retain its moisture better, weeds will be deterred too. Mulch can be dry leaves, twigs, grass or even shredded newspaper.
Fertilize: When you notice that your plant is rapidly growing or flowering, add a little compost to the soil. As a general rule, you could add a little compost (rich in egg shells), every 2-3 weeks.
Diseases and Other Concerns:
Pests: Look out for insects and other unwanted bugs on your plant, especially the under surface of the leaves. Manually remove any harmful looking bugs. But leave the spiders, lady birds and wasps alone. These are the good bugs to have around.
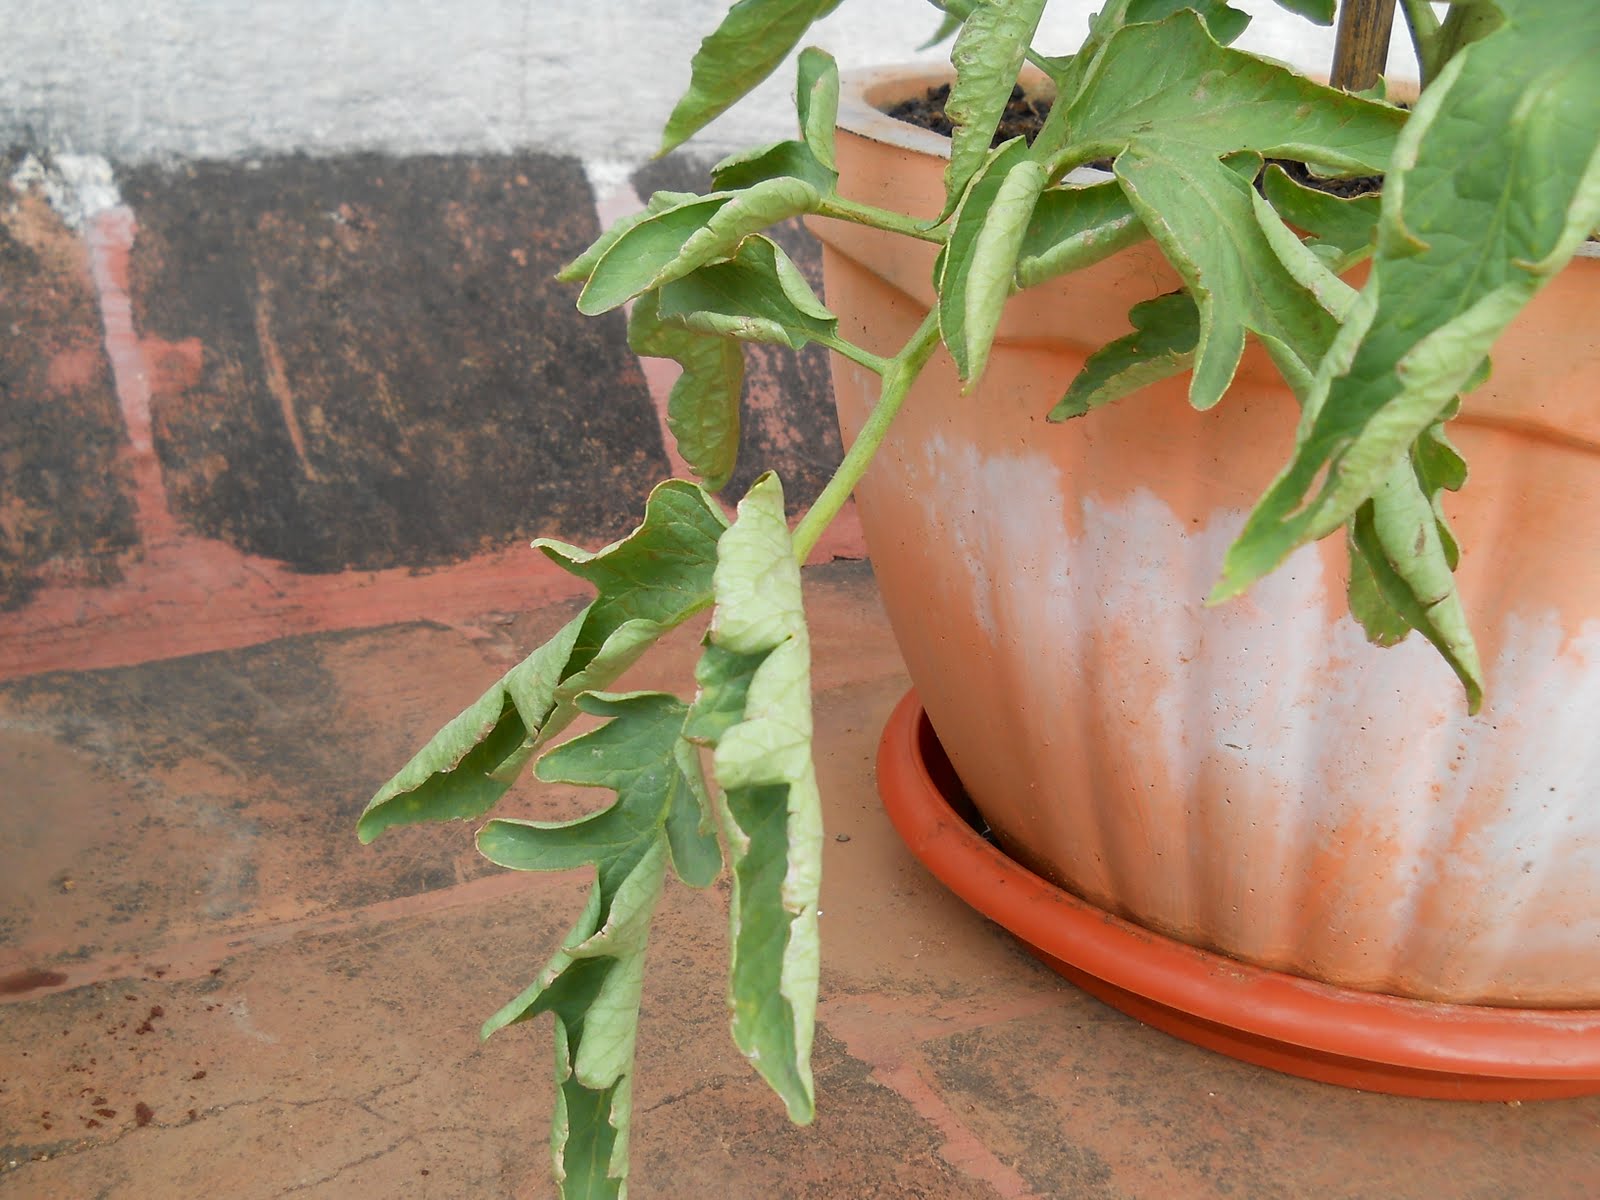
Leaf Curl: Very often the leaves of a tomato plant may curl. This is usually a sign of plant stress. In spite of it, you may still get healthy tomatoes. If you can remove the cause of the stress, the leaf curl will disappear. However, if the plant gets further stressed, it could succumb and die. So when you see leaf curl, try and ascertain the cause. And if you can’t, just keep your fingers crossed. I got a bountiful harvest despite leaf curl.
 |
| Leaf Curl: A Sign of Plant Stress |
Blossom End Rot: A few of my tomatoes began rotting at the bottom end. After a little googling, I learnt that there are many possible causes to this blossom end rot (BER): incorrect watering, calcium deficiency or some other nutrient inadequacy. I gathered that my plant may be calcium deficient. To fix it would mean to add some calcium in the soil that will immediately be available to it. Calcium from egg shells wouldn’t work as it would take a long time to reach the plant. Now when I began gardening, I had decided to go the organic route. Here, I was confronted with the issue of fixing my BER with a chemical or remaining organic and harvesting rotten tomatoes. With pangs of guilt, I chose the former, all the while consoling myself that a single calcium tablet, containing just 500 mg of calcium carbonate isn’t as evil as the regular chemical farming that we know of. So I went ahead and powdered a calcium tablet (Magnical) that I had with me, dissolved it in water and poured it into my pot. It seemed to have worked as there were no more tomatoes with BER thereafter.
 |
| Blossom End Rot: In an Unripe Tomato |
 |
| Blossom End Rot: In a Ripe One |
Ripening Tomatoes: Tomatoes appeared on my plant within 45 days of planting. It can take longer. Once a tomato is ready, it will colour from green to yellow to red, in a matter of a few days. Red ripe tomatoes on a green vine – a sight to feast on – will attract everyone, including predators like squirrels and crows. A few of my tomatoes were targeted by human predators. So if you find your tomatoes being stolen or damaged, you can pick them before they fully ripen. They may be plucked the moment they turn a slight yellow and ripened indoors, preferably near a sunny windowsill. They will ripen a tad slower, but the taste is indistinguishable from the vine ripened ones. Never refrigerate your tomatoes – green or red. They lose their flavor in the fridge.
 |
| Tomato Blossoms |
 |
| Tomatoes Ripening on the Vine |
Green Tomatoes: At the end of the season, you will be left with a few green tomatoes. That’s natural and don’t despair. There are plenty of recipes calling for green tomatoes. You could also try plucking the green tomatoes and leaving it to ripen. Some of my green tomatoes that showed no sign of ripening on the plant, actually ripened after they were plucked.
 |
| End of Season: Green Tomatoes and Brown Leaves |
Bottom Line: A tomato seed will germinate with ease, but for the seedling to grow into a fine fruit bearing plant in a pot, a little care is needed. Yet, when you are blessed with red ripe tomatoes on your vine, it seems worth all the effort. A fully laden tomato plant will make many heads turn. Those who rarely notice a spectacular plant or flower, will still stop to stare at the red tomatoes. Finally, the intense flavor of a homegrown red ripe tomato is the sweetest reward.
 | ||||
| Laden with Fruit |
 |
| Various Hues: Tomatoes in Various Stages |


